Contact List
The Contact Lists page allows you to organize your contacts into groups or organizations. These lists make it easy to manage and target specific audiences when sending bulk messages.
Overview
-
Purpose:
Create and manage lists to group contacts for messaging campaigns. Each list can represent an organization, department, or any segment you choose. -
Workflow:
- Create a new contact list using the Create List button.
- Add contacts to the lists from the Contacts page.
- Use lists to efficiently select recipients when composing messages.
Table Columns
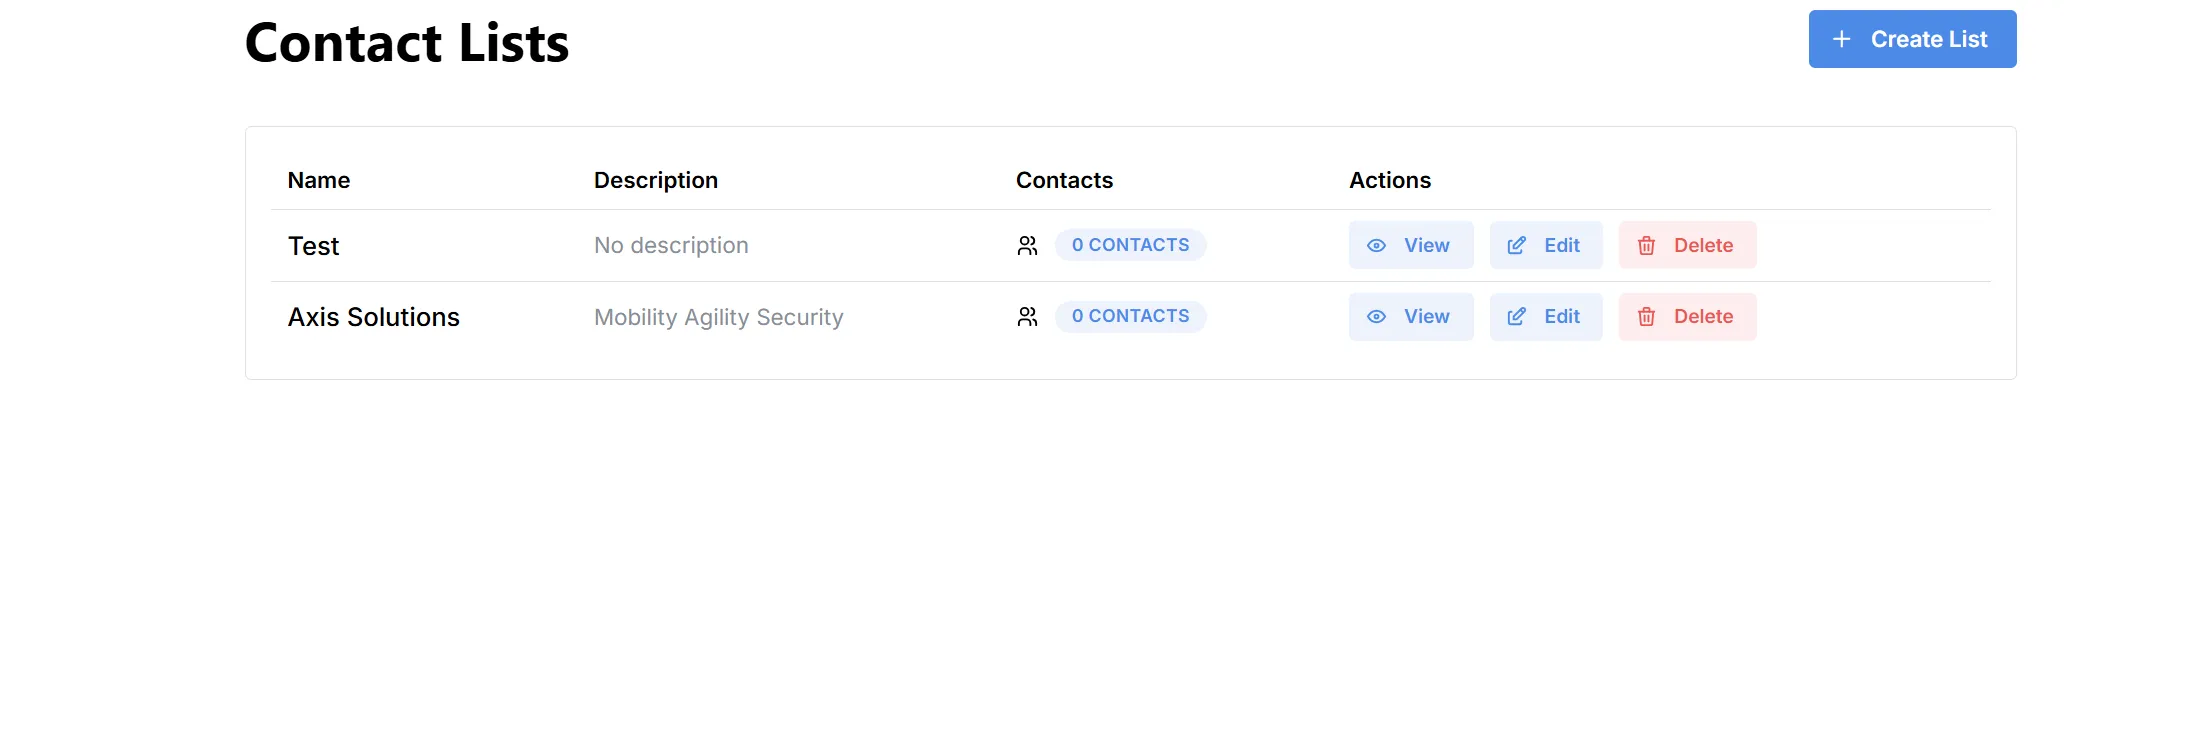
Actions
- View: See all contacts in a specific list.
- Edit: Change the name or description of the list.
- Delete: Remove the list permanently (cannot be undone).
The Create Contact List dialog allows you to define a new group or organization for your contacts. Use this feature to organize and segment your contacts for more efficient targeting during messaging campaigns.
Creating a New Contact List
-
Open the Contact Lists Page:
Click on “Contact Lists” in the main navigation. -
Click “Create List”:
Press the blue + Create List button in the top-right corner.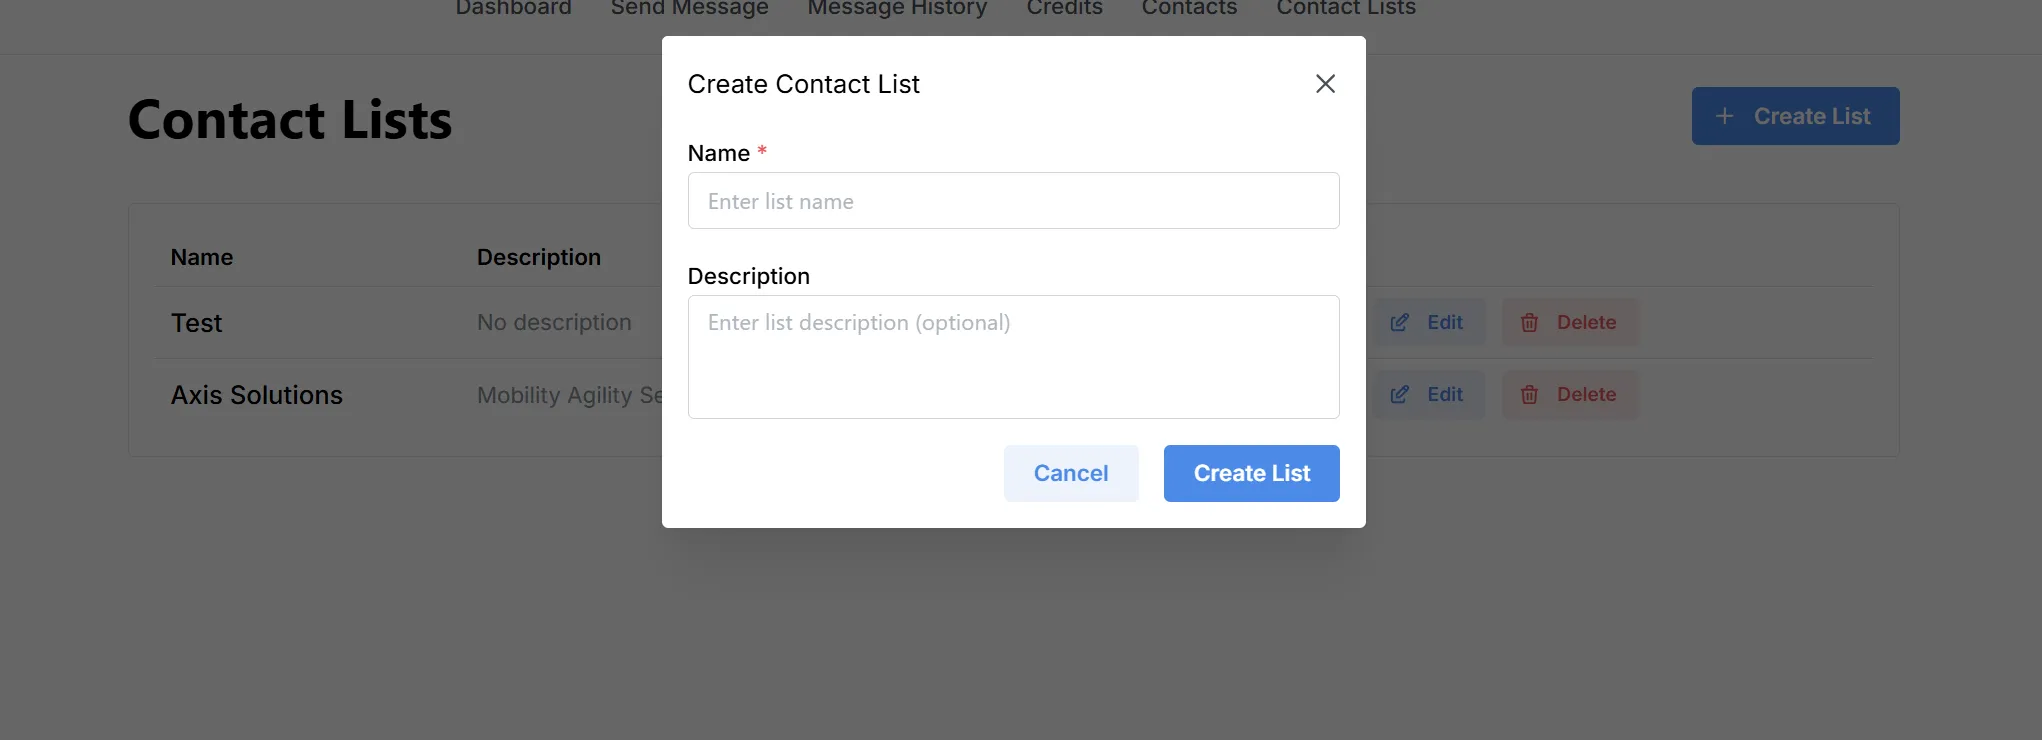
-
Fill Out the Form:
- Name (required):
Enter a name for your new contact list.
Example: “Customers 2025” or “Event Attendees” - Description (optional):
Optionally, add a description to clarify the purpose or audience of this list.
Example: “Clients who registered in 2025” or “Contacts for August event”
- Name (required):
-
Create List:
Click Create List to save your new contact list.
If you change your mind, click Cancel to close the dialog.